
Overview:
Installing artificial grass offers an easy solution for homeowners who want a beautiful, vibrant outdoor space without the hassle of constant upkeep. Unlike natural grass, artificial turf requires minimal maintenance—no more mowing, watering, or fertilizing. When installed correctly, it stays pristine and weed-free with just occasional cleaning, saving you time and money in the long run.
Tools Needed:

Materials:
Installing Artificial Grass:
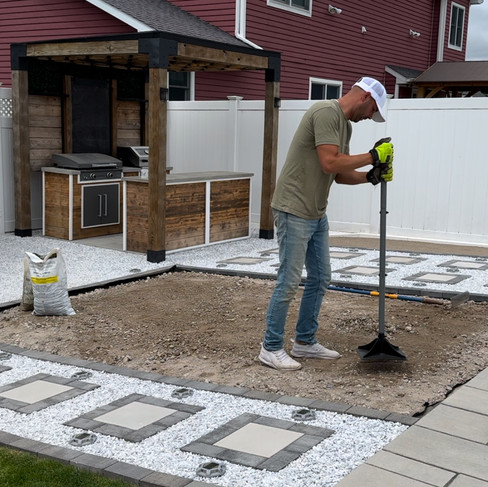
Before diving in, be aware that this is a labor-intensive project, especially when it comes to the digging phase. For larger areas, you may need to use a plate compactor to save time and effort. In this case, the job involved a 10'x13' space, and skipping the plate compactor made the compaction process much more time-consuming. With that in mind, let’s get started.

Step 1: Measure and Excavate
Once you've measured the area, remove all grass and debris. Dig down at least 4 inches to ensure you get below the grass roots. Clear away any loose debris with a rake, then compact the soil using a hand tamper or plate compactor.
If drainage is a concern, especially near structures, make sure to level and slope the area appropriately to direct water away from those areas. Proper preparation will set the foundation for a durable and long-lasting turf installation.


Step 2: Install a Border
Creating a clean border is a crucial step before installing your turf base. While there are several options to choose from, a paver border is one of the most effective and durable choices. Check out this video link to see how I installed my paver border.
Step 3: Weed Barrier and Base
After installing your border, cover the area with a non-woven weed barrier to prevent unwanted growth. Secure the barrier in place using landscape staples.
Next, it’s time to add your base material to create a 4-inch foundation. For this project, I used a recycled concrete aggregate base. Other options include crushed stone or decomposed granite. Spread the base material evenly in 1-2 inch layers and compact each layer using a plate compactor or hand tamper, depending on the project's size. Avoid adding all the base material at once, as this will make proper compaction difficult.
While compacting the base, lightly dampen it with a hose set to mist to help achieve proper compaction. Use a level throughout the process to ensure the surface is evenly sloped for effective drainage.
For an extra touch, you can add an optional half-inch layer of paver sand on top of your base. Compact this layer as well to create a smoother surface and fill in any small gaps in the aggregate base, adding a bit more cushion to the final installation.


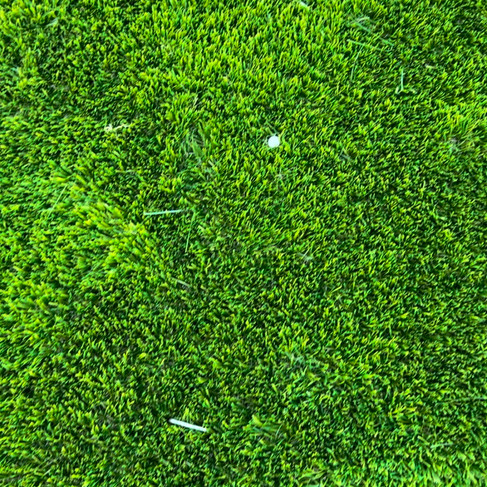
Step 4: Roll Out and Secure Artificial Grass
Roll out your artificial grass, leaving it slightly overhanging the edges of your border. Allow the turf to sit in the sun for a few hours to expand properly. Once it has expanded, begin securing it by starting in one corner with 6-inch turf spikes, working your way outward, and using a knee kicker to stretch the turf as you go.
Place the turf spikes approximately one foot apart, ensuring you use the knee kicker to stretch the turf tightly. This step is essential to prevent the turf from bunching up and ensures a smooth, professional finish.
When driving the spikes into the turf with a hammer, leave the heads slightly exposed. Afterward, use another spike to gently pull the grass blades away from the spike heads. This prevents the turf from being pressed down by the spikes, which can cause visible dents and detract from the realistic appearance of the grass.


Step 5: Combining Turf Seams (If Applicable)
This step is necessary only if you're working with multiple turf rolls and need to join them with a seam. The easiest way to create a seam is by using a straight edge, but if you're looking for a more advanced technique to better conceal the seam, you can try an "S" seam.
For a straight seam, ensure the turf blades are aligned in the same direction. Place seam tape on your base underneath the turf rolls to secure the edges together. Be sure the rolls don’t overlap, keeping them about 1/16" to 1/8" apart to align the blades and make the seam less noticeable.
Once the rolls are positioned, continue securing the turf with spikes around the edges. For added strength and to hold the rolls together more securely, you can use 6-inch landscape staples. If using staples, be sure to pull any blades of turf out from under them before hiding them, just as you would with the spikes, to maintain a clean, natural appearance.


Step 6: Trim the Edges
Before securing the edges with 5-inch spikes, about an inch from the border, you'll need to trim the turf. Start by folding back the overlap, and with a sharp utility knife, carefully cut through the turf mat from underneath.
Repeat this process all the way around the turf borders. Once trimmed, secure the edges with turf spikes, placing them approximately every 4 inches to hold the turf in place.
Step 7: Hide Spikes and Add Infill
Take your time to carefully hide all the spikes, ensuring that you don't press the turf blades down and create dents.
Once the spikes are concealed, it’s time to add the infill. Depending on your project, you can choose between silica sand, rubber infill, or even play sand (make sure to research which option works best for your needs).
Evenly distribute your chosen infill, aiming for about 2 pounds per square foot. Use a power brush or broom to work the infill into the turf, making sure it's fully absorbed and no longer visible. This step is crucial for keeping the turf blades upright, giving your artificial grass a more natural appearance.


Final Thoughts:
Installing artificial turf can save you time and effort in the long run by transforming your space into a low-maintenance area. However, the installation process itself can be time-consuming, so it’s important to take your time and pay attention to every step—from preparing the base to laying the turf. Doing so will ensure a seamless, natural-looking result.
Don’t make the mistake of buying just any turf. Be sure to purchase from a trusted supplier that offers a solid warranty, typically in the 10-15 year range. Opting for cheap turf from big box stores may seem like a bargain, but it’s likely to wear out much sooner, costing you more in the long run.
While artificial turf requires less upkeep than natural grass, that doesn’t mean it’s completely maintenance-free. Regularly remove debris, but avoid using a household vacuum, as it can damage the turf blades. Instead, use a leaf blower to gently clear off any leaves or dirt.


Once your turf is installed and properly maintained, take the time to relax and enjoy your beautiful new outdoor space. It’ll quickly become your favorite hangout spot in the backyard!
Comments